If you have used Windows 10 before, you might know that the file explorer has the ability to hide/unhide files. You can easily hide or unhide files from the View menu of Windows 10. However, since Windows 11 has a new file explorer, the option to show hidden files and folders has been changed. It’s not that the option to show hidden files and folder don’t exist on Windows 11, but it’s not the same anymore. So, if you are unable to find the hidden files and folders option in Windows 11, you are reading the right article.
Steps to Show Hidden Files & Folders in Windows 11
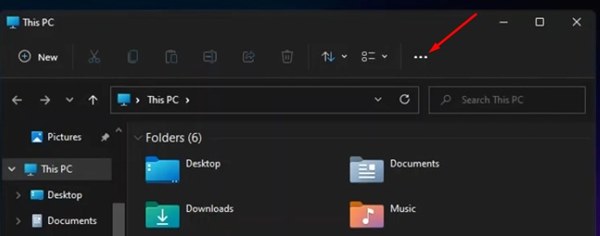
In this article, we are going to share a step-by-step guide on how to show hidden files and folders in Windows 11. The process is going to be very easy; follow some of the simple steps given below. Step 1. First of all, open File Explorer on your Windows 11 computer. Step 2. On the File Explorer, click on the three dots as shown in the screenshot below.
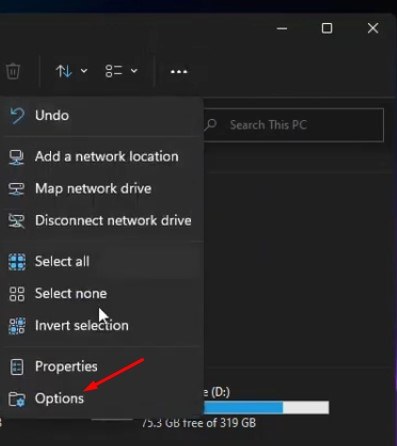
Step 3. From the drop-down menu, click on the ‘Options‘.
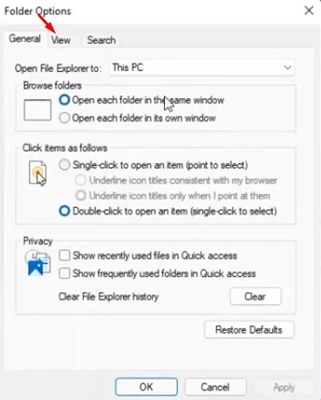
Step 4. On the Folder options, click on the ‘View‘ tab.
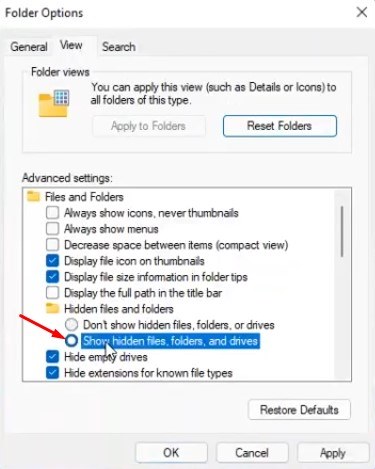
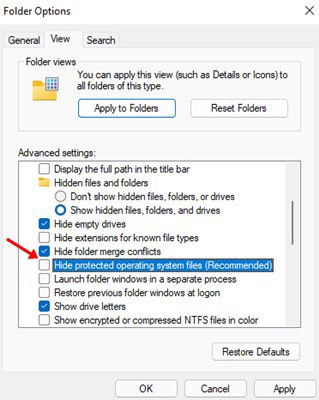
Step 5. Scroll down and enable the option ‘Show hidden files, folders, and drives’. This will show all hidden files and folders.
Step 6. Next, find and uncheck the option ‘Hide protected operating system files’.
Step 7. Once done, click on the ‘Ok‘ button. Step 8. If you wish to disable the hidden files and folders, uncheck the option ‘Show hidden files, folders and drives’ in Step no. 5 and 6. That’s it! You are done. This is how you can show hidden files and folders in Windows 11. To disable the hidden files and folders, revert the changes you have made. So, this guide is all about how to show hidden files and folders in Windows 11. I hope this article helped you! Please share it with your friends also. If you have any doubts related to this, let us know in the comment box below.
