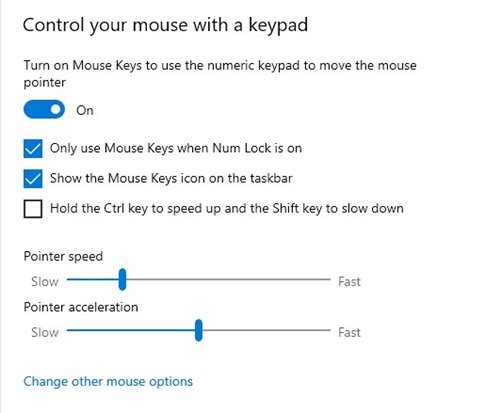
The ‘Mouse Keys’ feature is available on Windows 10 and Windows 11 operating systems, and it lets you use your numeric keypad as a mouse. The feature is convenient in situations where you don’t have a mouse connected to your PC. Also Read: How to Run Android Apps on Windows 11 (Step-by-step Guide)
Steps to Use Numeric Keypad as Mouse on Windows 10/11
So, if you are interested in using your numeric keypad as a mouse on Windows 11, you are reading the right guide. Below, we have shared a step-by-step guide on using your Numeric keypad as a mouse on Windows 10/11. Let’s check out.
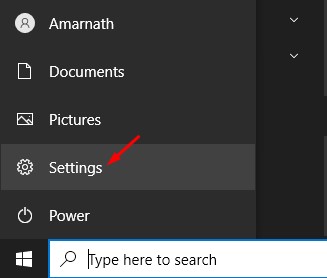
First of all, click on the Windows 10 start button and select Settings.
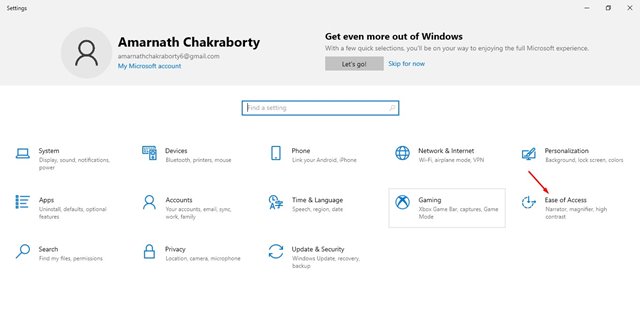
On the Settings page, click on the Ease of Access option.
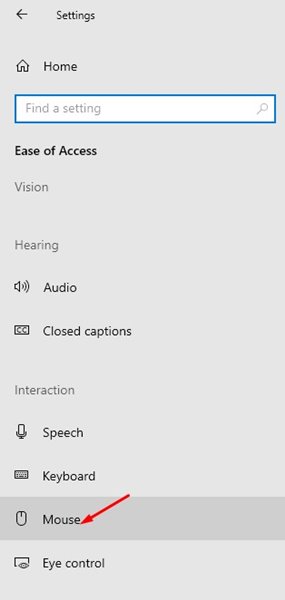
Now, on the left pane, click on the Mouse option under the Interaction.
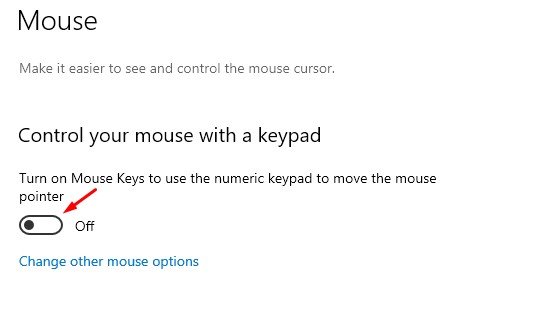
On the right pane, enable the option Control your mouse with a keypad.
Now, you need to set the Mouse Keys speed and Mouse keys acceleration. Set the speed as per your wish.
Now, you can move your pointer by pressing the 1, 2, 3, 4, 6, 7, 8, or 9 keys on the numeric keypad. To activate Mouse keys on Windows 11, you need to open Settings > Accessibility > Mouse Keys. After that, the rest of the process is the same.
How to click with Mouse keys?
Well, you can use the critical combinations shared below to click while using mouse keys. The ‘5′ Key – This one performs the active click (Left click) The ‘/’ key – This also performs a left-click. The ‘-‘ Key – This one performs a right-click. The ‘0’ Key – This one locks the left click (for dragging items) The ‘.’ Key – This one ends the action set by the 0 Key. That’s it! You are done. This is how you can activate the Mouse keys feature on Windows 10/11. So, this guide is all about how to use your numeric keypad as a Mouse on Windows 10/11. I hope this article helped you! Please share it with your friends also. If you have any doubts related to this, let us know in the comment box below.
